by Troy Smart | Jun 26, 2023 | Informative
Your roof is an essential component of your home, protecting you and your family from the elements. Over time exposure to harsh weather conditions can cause wear and tear, particularly in the mortar that holds your roof tiles together.
This is where roof re pointing comes in. In this article, we will explore what is roof pointing, why it is necessary to repoint roof, and how you can determine if your roof requires this important maintenance procedure.
What Is Roof Pointing?
Re pointing roof refers to the process of replacing or repairing the mortar between the tiles or slates on a roof. Mortar is a mixture of cement, sand, and water that is used to bind the roof tiles together and create a waterproof seal.
Over time, exposure to the elements causes the mortar to deteriorate, resulting in cracks, gaps, or even complete disintegration. Pointing roof involves removing the old, damaged mortar and replacing it with fresh mortar to ensure the structural integrity and weather resistance of the roof.
What Is Ridge Capping?
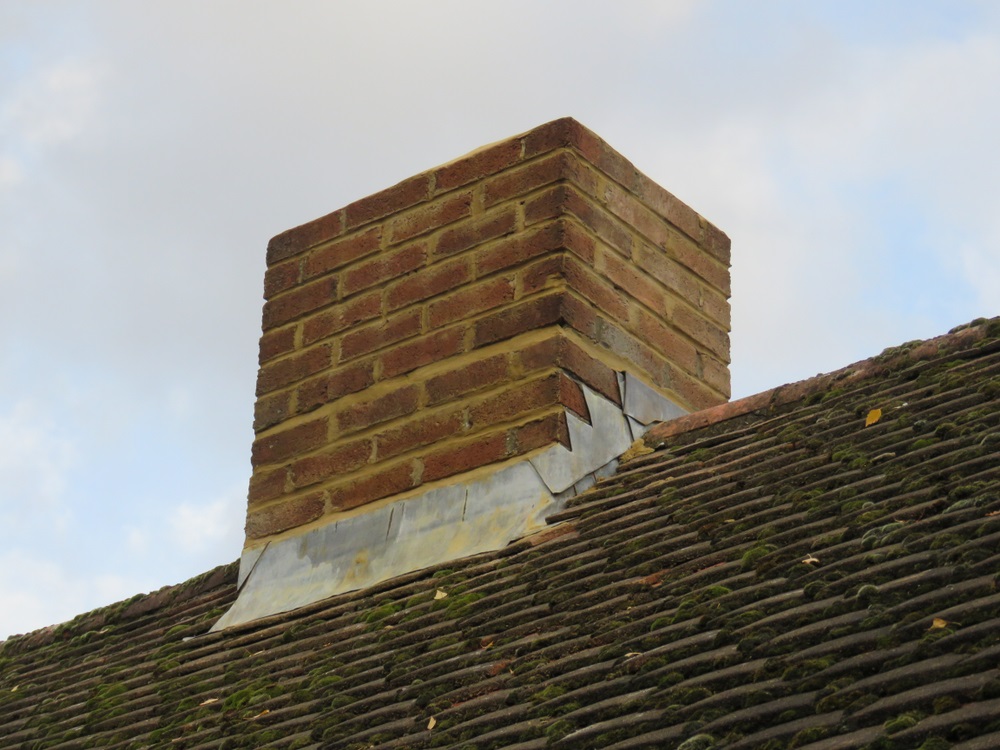
Ridge capping is a crucial component of the roof, especially in pitched roofs. Ridge capping refers to the cement or mortar that covers the ridge line of a roof where two slopes meet. It is the finishing touch that covers the ridge line.
Ridge capping tiles or slates are bedded in mortar and pointed to provide a watertight seal. Ridge capping serves as a protective barrier, preventing water penetration and keeping the underlying structure secure.
This is a critical area prone to damage, as it is exposed to the full force of the weather. Similar to the mortar between individual tiles, the mortar in ridge capping can degrade over time and require repointing a roof. Repointing the ridge capping is often included in the overall roof re pointing process.
Flexi point is a convenient product used for ridge pointing of the ridge caps of cement and terracotta roof tiles. Flexi point is a pre-mixed and pre-coloured compound that is trowel applied.
What Is Pointing Roof & Roof Bedding?
Pointing a roof and bedding are two essential processes involved in re pointing roof. While they are related, they serve different purposes and are carried out in distinct areas of the roof.
Pointing Roof
Roof tiles pointing refers to the application of mortar to the external face of the joint between the roof tiles. Repoint roof primary function is to seal any gaps or cracks in the mortar, providing a protective barrier against water penetration and improving the overall aesthetics of the roof.
Roof Bedding
Roof bedding, on the other hand, involves creating a strong base by applying mortar to the surface on which the roof tiles are laid. It is typically performed on ridge capping, which is the cement or mortar covering the ridge line of the roof where two slopes meet. The roof bedding process ensures stability and secures the tiles or slates in place.
What is the Difference Between Pointing a Roof & Roof Bedding?
Both roof tiles pointing, and roof bedding are crucial for maintaining the integrity and longevity of your roof. Roof tiles pointing protects against water damage and improves the visual appeal, while roof bedding provides a solid foundation for the roof tiles or slates, ensuring they stay securely in place.
It’s important to note that the specific techniques and materials used for roof tiles pointing and roof bedding may vary depending on the type of roof and local building practices. Hiring a professional roofing contractor will ensure that these processes are carried out correctly, maximizing the effectiveness and durability of your roof.
To better understand the difference between roof tiles pointing and roof bedding, let’s compare them in the following table:
| |
Pointing |
Roof Bedding |
| Purpose |
Sealing gaps and cracks in mortar joints |
Creating a strong base for tiles |
| Location |
External face of mortar joints between tiles |
Surface on which tiles are laid |
| Function |
Protects against water penetration and enhances aesthetics |
Provides stability and secures tiles |
| Materials |
Mortar applied to the joints between tiles |
Mortar applied to the surface for tile placement |
| Importance |
Ensures water-tightness and improves the appearance of the roof |
Enhances structural stability and prevents dislodgment |
Why Do You Need Repointing A Roof?

As mentioned earlier, exposure to the elements can cause the mortar in your roof to deteriorate. Cracked or eroded mortar joints can allow water to seep into your roof, leading to leaks, water damage, and even structural issues.
By undertaking regular roof re pointing, you can prevent these problems and extend the lifespan of your roof. It is recommended to have your roof inspected by a professional to determine if repointing a roof is necessary.
| Reasons for Repointing |
Explanation |
| Weathering & deterioration |
Mortar joints deteriorate due to weather exposure. repointing a roof maintains strength. |
| Water Leaks |
Cracked mortar allows water penetration, causing leaks. repointing a roof prevents water damage. |
| Structural Stability |
Deteriorated mortar compromises roof stability. Pointing a roof supports roof structural integrity. |
| Aesthetic Enhancement |
Worn-out mortar decreases roof appearance. repointing a roof improves the overall look. |
| Longevity & Cost-Saving |
Regular repointing a roof extends roof lifespan, avoiding costly repairs and premature replacement. |
How Do I Know If My Roof Needs Re-Pointing Or Re-Bedding?
Determining whether your roof requires roof re pointing or re-bedding can be done by inspecting the condition of your roof and identifying specific signs of deterioration. Here are the key points to consider:
- Cracked or crumbling mortar: Examine the mortar joints between the roof tiles. Look for cracks, gaps, or areas where the mortar is crumbling away. These indicate that roof tiles pointing is necessary.
- Loose or dislodged tiles or slates: If you notice any tiles or slates that are loose, shifted from their original position, or have become dislodged, it may be a result of deteriorating mortar. Pointing on roof or re-bedding is essential to secure them back in place.
- Water leaks: If you experience water leaks inside your home during rainstorms, it could be due to gaps or cracks in the mortar joints. Roof re pointing helps seal these openings and prevents further leakage.
- Visible wear and tear: Over time, the mortar can wear away, become discoloured, or develop a powdery texture. If you observe these signs on your roof, it indicates that your roof may benefit from roof re pointing to maintain its structural integrity.
It’s important to note that a professional roof inspection is recommended to assess the condition of your roof and determine the appropriate course of action. They have the expertise to identify any underlying issues and provide expert advice on whether roof re pointing or re-bedding is necessary.
To summarize the points mentioned above, here’s a table outlining the signs that indicate whether your roof needs roof re pointing or re-bedding:
| Signs |
Re-Pointing Needed? |
Re-Bedding Needed? |
| Cracked or crumbling mortar |
Yes |
No |
| Loose or dislodged tiles or slates |
Yes |
Yes |
| Water leaks |
Yes |
No |
| Visible wear and tear (discolouration, powdery texture) |
Yes |
No |
How Is Roof Repointing Done?
Roof tile repointing is a meticulous process that involves several steps to ensure a proper and long-lasting repair.
It’s worth noting that the specific techniques and materials used for roof re pointing can vary depending on factors such as the type of roof, the climate, and local building practices.
Here’s a detailed explanation of how roof re pointing is typically done:
- Assessing the extent of the damage and determining the best course of action:
A professional roofing contractor will inspect your roof to evaluate the condition of the mortar joints and identify any underlying issues. They will assess the extent of the damage and determine whether roof tile repointing or re-bedding is required.
- Removing the old mortar and preparing the surface for the new mortar:
The next step is to remove the old, damaged mortar. This is done using specialized tools like a chisel, grinder, or mortar rake. The goal is to carefully remove the deteriorated mortar from between the roof tiles without causing any damage to the surrounding materials. Once the old mortar is removed, the surface is thoroughly cleaned and cleared of any debris to provide a clean base for the new mortar.
- Mixing and applying the new mortar:
The new mortar is mixed according to the recommended ratios, usually combining sand, cement, and water. The mixture should have a consistency that allows it to be workable and easily applied. The mortar is then applied to the joints between the roof tiles using a pointing trowel or mortar gun. The mortar is pressed firmly into the gaps, ensuring a secure bond, and filling spaces.
- Finishing and smoothing the new mortar:
After applying the new mortar, the excess is removed using a pointing trowel or brush. This step helps achieve a neat appearance. The surface of the fresh mortar is then smoothed to match the existing profile of the roof. This can be done using a specialized tool called a jointing iron. Smoothing the mortar not only enhances the aesthetics but also improves its resistance to water penetration.
Benefits Of Roof Repointing
Roof re pointing offers several benefits:
- Improved Waterproofing: Replacing damaged mortar joints helps maintain the water resistance of your roof, preventing leaks and water damage to your home’s interior.
- Enhanced Structural Integrity: By strengthening the connections between the tiles or slates, roof re pointing ensures that your roof remains stable and can withstand adverse weather conditions.
- Prolonged Roof Lifespan: Regular repointing a roof can significantly extend the lifespan of your roof, saving you money in the long run by avoiding costly repairs or premature replacement.
- Aesthetic Appeal: Freshly re-pointed mortar can rejuvenate the appearance of your roof, giving it a cleaner, more polished look.
How Much Does It Cost to Repoint Roof?
The cost of roof re pointing can vary depending on various factors, including:
- Size & Pitch Of The Roof: Larger roofs with steeper pitches require more materials and labour, leading to higher costs of roof tile repointing.
- The Extent Of The Damage: The severity of the mortar deterioration and the number of joints requiring repair will impact the overall cost of pointing on roof.
- Type Of Material Used For The New Mortar: Different mortar mixes and materials can vary in cost, with premium options generally being more expensive.
- Professional Labour Costs: Hiring a reputable roofing contractor will ensure a high-quality job but may come at a higher price.
Invest in Your Roof’s Future
Re pointing roof is a vital maintenance task that can protect your home from water damage, extend the lifespan of your roof, and enhance its overall appearance.
By recognizing the signs of deteriorating mortar and seeking professional advice, you can determine if roof tile repointing or roof bedding is necessary.
Investing in regular roof maintenance, including repointing a roof, is a wise decision that will safeguard your home and provide you with peace of mind for years to come.
Say Goodbye to Leaks || Roof Longevity Guaranteed
Contact a professional roofing contractor today!
Schedule an inspection and ensure the longevity of your roof.
FAQs
1. What do you use to point a roof?
For roof pointing, cement mortar is typically used. However, flexible pointing chemicals have started to be used recently. These adjustable pointing materials have the advantage of expanding and contracting with the weather.
2. Do roof tiles need pointing?
Roof tiles pointing is crucial because over time the roof bedding erodes and breaks. The mortar that surrounds the roof tiles and rests on top of the roof bedding is called pointing. It keeps the tiles firmly in place and fills up any gaps or cracks between them.
3. What is roof rebedding?
Rebedding is the act of removing the old cement mortar from beneath the ridge tiles, fixing the linked ridge caps to hold the roof tiles in place, and then repainting the ridge tiles. This is necessary when the mortar is damaged or severely cracked.
4. How often should a roof be repointed?
Repointing your roof about every 10 to 15 years is advised. You should keep an eye out for a few signs that might mean your roof needs repointing sooner rather than later.
5. Why are roofs pointed?
Pitch roofs are made to stand up to wind, rain, snow, and ice. They are sturdy, and solid, and guarantee ideal water drainage because of their triangle shape.
by Troy Smart | Jun 9, 2023 | Informative
Leaks on a metal roof can be a homeowner’s nightmare, especially when it comes to metal roofing. While metal roofing is known for its durability, it can still encounter issues that lead to leaks. Identifying the causes of these leaks is crucial for effective metal roof repair.
In this comprehensive guide, we will explore the eight major causes of leaks on metal roofs and provide you with effective repair solutions. Don’t let a leaking metal roof dampen your spirits – let’s dive into the details!
8 Major Causes of Metal Roof Leaks || A Comprehensive Guide
Metal roofs can leak. Understanding the major causes of leaks on metal roofs is crucial. By identifying these major causes of leaks on metal roofs, homeowners and building owners can take proactive measures to address any potential issues promptly.
1. Fastener Issues | Metal Roofing Screws
Fasteners, such as metal roofing screws, play a critical role in securing metal roofing panels to the underlying structure. Several issues related to fasteners can lead to leaks:
- Overdriven screws: When screws are driven too deeply into the metal roofing panel, they can penetrate the surface, compromising its integrity and creating a pathway for water infiltration.
- Underdriven screws: If screws are not driven inadequately, the roof panels may not be tightly secured, allowing water to seep through gaps.
- Screws driven at the wrong angle: Incorrectly angled screws can fail to create a tight seal, leaving gaps for water to penetrate.
- Screws that have missed the metal strut or wood framing below: Misaligned or improperly installed screws can miss the intended target, resulting in loose or insecure roofing panel and trims that may allow water entry.
2. Faulty Stack Flashings
Stack flashings are used to seal penetrations in the roof caused by vents, pipes, or other protrusions. If stack flashings are not properly installed or become damaged, leaks on metal roofs can occur. Common issues include cracks, gaps, or improper sealing around the penetration, allowing water to infiltrate the roof system.
3. Damaged or Missing Sealants
Metal roof sealants are vital for creating a watertight barrier between metal roof components. Several areas require sealants for optimal protection against leaks on a metal roof:
- Metal Ridge Caps: Ridge caps, which cover the ridge line where two roof slopes meet, should be sealed properly to prevent water from seeping under the caps and into the roof system.
- Z-Flashings: Z-flashings are used to seal the junction between the roof and vertical walls or chimneys. Damaged or missing metal roof sealants in this area can allow water to enter.
- Roof Transitions: Transitions between different roof sections or materials should be adequately sealed to prevent water infiltration at these vulnerable points.
- Counter Flashings: Counter flashings are installed over the top edge of vertical wall flashings to provide additional protection. Damaged or poorly sealed counter flashings can lead to leaks.
- Reglets: Reglets are grooves or channels cut into walls to receive flashing elements. Insufficient or damaged metal roof sealants in reglets can cause water penetration.
Pitch Pans: Pitch pans are used to seal irregular roof penetrations, such as pipes or conduits. Cracked or deteriorated metal roof sealants in pitch pans can result in leaks.
4. Faulty Curb Flashings
Curb flashings are employed to seal roof penetrations around equipment curbs or skylights. If curb flashings are not properly installed or maintained, water can infiltrate the roof system. Issues such as inadequate sealing, cracks, or gaps around the curb flashings can contribute to leaks.
5. Seams & Overlaps
Metal roof panels typically have seams and overlaps where adjacent roofing panel and trims join together. If these seams are not correctly sealed or if the overlaps become damaged, water can penetrate the metal roofing system. Improperly sealed seams, gaps, or loose connections between metal roofing panel are common culprits for leaks.
6. Rust & Corrosion
Rust and corrosion can damage metal roofing, leading to weakened structural integrity and the formation of holes or cracks through which water can penetrate. Corrosion occurs due to exposure to moisture, saltwater, acidic rain, or chemicals, causing pitting, cracking, or flaking of the metal surface.
Damaged coatings or surfaces compromise the roof’s ability to resist water, increasing the likelihood of leaks on metal roofs over time. Regular inspections, roof maintenance, protective coatings, proper drainage, and addressing rust or corrosion promptly are vital for preventing leaks and ensuring the longevity of metal roofing.
7. Aging & Mechanical Wear Tear
As metal roofing ages, it can experience wear and tear, potentially leading to leaks. Several factors contribute to this deterioration:
- Thermal expansion and contraction: Metal roofing expand and contract with temperature fluctuations, which can cause stress and strain on the roof components over time.
- Harsh weather conditions: Exposure to severe weather, such as high winds or heavy rains, can gradually degrade metal roof materials and joints.
- UV radiation: Continuous exposure to UV rays can lead to the breakdown of protective coatings, weakening the roof’s overall integrity.
- General wear and tear: Normal aging and usage can cause metal roofing to experience degradation, including loosening of fasteners, sealant deterioration, or metal roofing panel deformation.
8. Poor Roof Maintenance & Debris Build-up
Regular roof maintenance is crucial for the longevity and performance of metal roofing. Metal roofs can leak when routine inspections, cleaning, and maintenance are neglected. Common issues associated with poor roof maintenance include:
- Debris Build-up: Accumulated leaves, branches, and other materials can create water dams and block drainage systems,
- Clogged Gutters: Accumulated debris, such as leaves or twigs, can block gutters and prevent proper water drainage, leading to water pooling on the roof and potential leaks.
- Damaged Protective Coatings: Lack of roof maintenance can result in deteriorated protective coatings, making the metal roof more susceptible to rust, corrosion, and water infiltration.
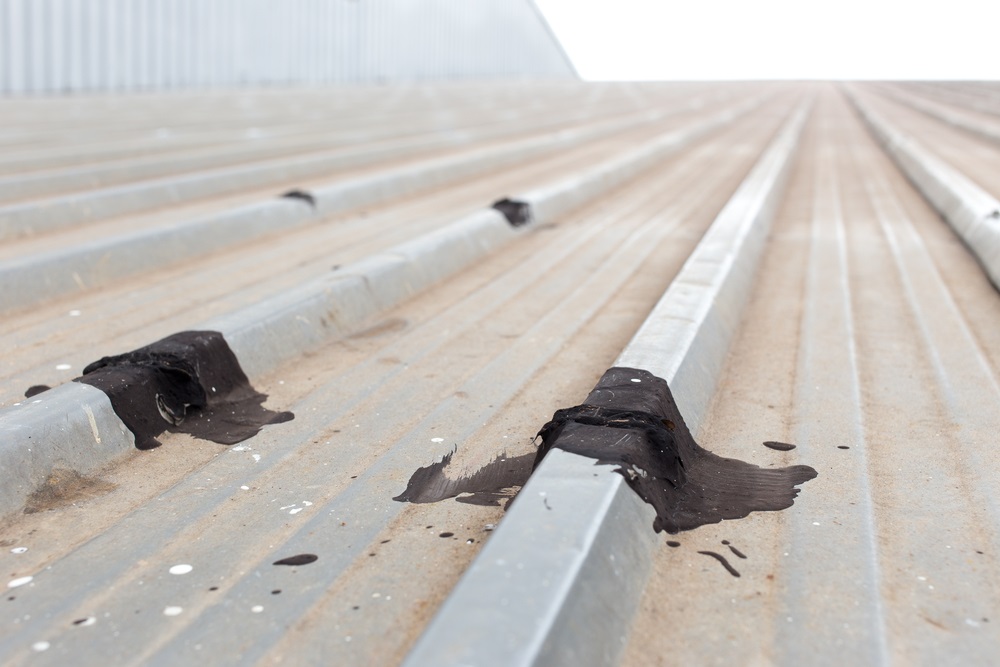
Temporary Fixes To Stop The Leak
While waiting for professional repairs, temporary fixes can help stop metal roofing leaks and minimize damage. Here are some temporary solutions:
- Using Polyethylene Plastic Sheets: Secure plastic sheets over the affected area to provide temporary protection from rainwater.
- Waterproof Tarps: Cover the leaking area with a waterproof tarp to prevent water from entering the structure.
- Tar Papers: Apply tar paper over the leak as a temporary barrier against water.
- Applying Spray Form: Use spray foam to seal small gaps temporarily.
Permanent Solutions To Fix A Leaky Metal Roof
For long-term solutions to leaks on metal roofs, permanent repairs are necessary. For permanent solutions, here are some effective options:
1. Roof Sealant | Use High-Grade Epoxy Resin
Apply a high-grade epoxy resin roof sealant to seal gaps and prevent water infiltration. Applying a high-quality roof sealant can provide a durable and watertight barrier, preventing further leaks.
2. Install An Extra Layer Of Metal Sheeting
Adding an extra layer of metal sheeting over the existing roof can strengthen the structure and provide an additional protective layer against leaks on a metal roof. The extra layer of metal sheeting also reinforces the roof’s waterproofing and extends its lifespan.
3. Install New Flashing
Properly install new flashing to ensure a watertight seal around penetrations and roof edges. Replacing damaged or inadequate flashings with new ones can effectively seal vulnerable areas and prevent water infiltration.
4. Remove/Replace All Screws & Fasteners
If fasteners are the primary cause of leaks, replacing all screws and fasteners with appropriate ones can eliminate the issue. If fastener issues persist, then replacing all screws and fasteners may be required to achieve a secure connection and prevent future leaks.
5. Remove/Replace Entire Metal Roof
In some cases, replacing the entire metal roofing may be the best course of action, particularly if the roof is over a decade old or has significant damage. If the metal roofing is extensively damaged or past its lifespan, replacing the entire roof may be the most effective solution to prevent future leaks. Signs of extensive rust, loose panels, and widespread leaking indicate a deteriorated roof that may require complete replacement.
6. Roof Coating/Roof Restoration
Installing a roof coating system over the existing metal roof can provide an additional protective layer, and a renewed waterproofing barrier and enhance the roof’s performance. This solution is cost-effective and can extend the lifespan of the roof.
7. SPF Over The Existing Metal Roof | Spray Foam Roofing
Spray foam roofing involves using a layer of foam insulation and waterproofing over the existing metal roof. Applying spray foam roofing over the existing metal roof can create a seamless, insulating barrier that protects against leaks on metal roofs and reduces energy costs. It provides excellent insulation and eliminates leaks by sealing the entire roof surface.
Dangers of Neglecting a Metal Roof Leak
Ignoring leaks on a metal roof can have severe consequences. Leaks can lead to water damage, mould growth, compromised structural integrity, and even pose safety hazards.
Addressing leaks on metal roofs promptly not only prevents further damage but also improves the roof’s overall performance, ensuring longevity and saving money in the long run.
1. Structural Damage ─ The Undermining Threat
A metal roof leak gradually weakens the building’s structure, penetrating hidden areas and compromising support beams. Moisture erosion can undermine the foundation, endangering occupants and causing irreparable harm.
2. Mould and Mildew ─ The Silent Saboteurs
Untreated leaks on a metal roof create a breeding ground for mould and mildew. These invaders thrive in damp environments, pose health risks, and silently damage the building’s interior, affecting occupants’ well-being.
3. Electrical Hazards ─ Sparks Amidst the Drips
Water infiltrating through a metal roof leak can cause short circuits, electrical shocks, and fires. The corrosive nature of water weakens electrical components, compromising safety measures and creating a hazardous environment.
4. Energy Efficiency ─ Draining the Resources
Neglected leaks on a metal roof undermine energy efficiency by infiltrating insulation and disrupting the thermal barrier. Heat transfer increases energy consumption, straining heating and cooling systems and leading to higher utility bills.
5. Increasing Repair Costs ─ High Price of Delay
Ignoring a metal roof leak results in escalating repair costs. Unaddressed leaks cause widespread damage, including structural issues, mould infestation, electrical hazards, and diminished energy efficiency, leading to hefty remediation expenses.
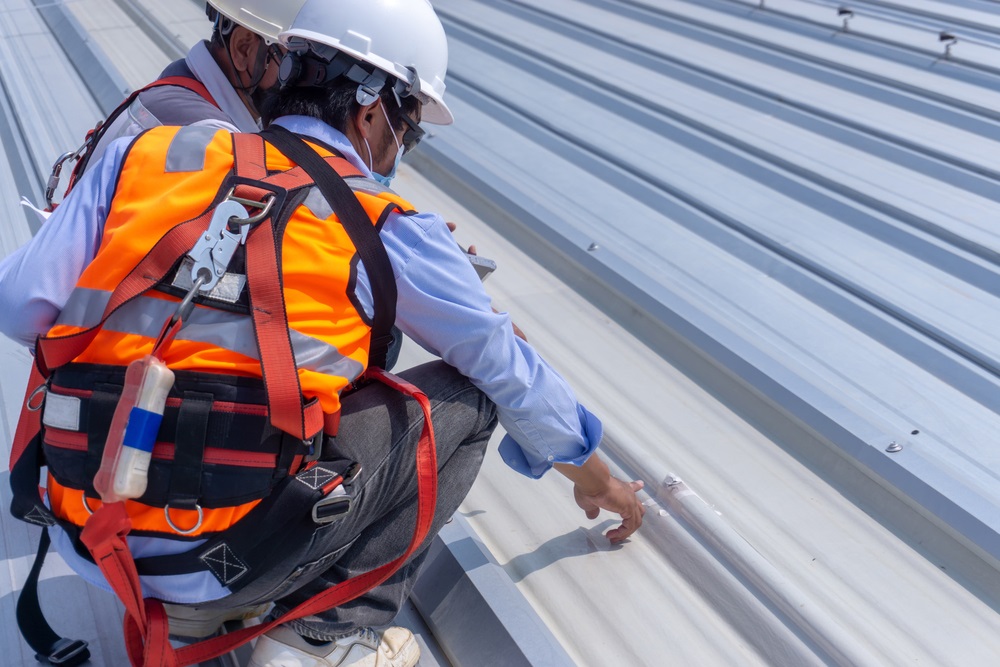
DIY vs. Professional Metal Roof Leak Repair
While some temporary fixes can be done by homeowners, repairing a leaking metal roof is a complex task that often requires professional expertise. While temporary fixes can offer temporary relief, professional roofing services are recommended for lasting repairs.
Hiring a reliable roofing contractor ensures that the underlying causes of the leaks are identified and properly addressed. Professional roofers possess the expertise, tools, and materials necessary to identify and address the underlying causes of leaks on metal roofs effectively.
Average Metal Roof Repairs Cost in Australia
The average metal roof repair costs in Australia can vary depending on several factors such as the extent of the damage, the size of the roof, the type of metal used, the labour involved, and the location within Australia. Additionally, the cost may also vary based on the contractor you choose and their pricing structure.
On average, metal roof repairs can range from $500 to $5,000, but the cost can be higher for more extensive repairs. Keep in mind that these figures are approximate and can vary significantly.
Get Metal Roof Evaluation Today
Don’t let a leaking metal roof become a major problem. Get your free metal roof evaluation today! Stop leaks, improve performance, and save money by taking proactive steps to repair your metal roof.
Contact a reliable metal roofing contractor to ensure fool-proof repairs and roof maintenance to protect your investment in your home or building. Act now and enjoy leak-free, durable metal roofing for years to come.
FAQs
Can A Metal Roof Leak Stop On Its Own?
Roof leaks must be repaired immediately to prevent more damage. They do not repair themselves. As a result, it’s crucial to get your metal roof examined immediately if you see any leaks.
Is It Better To Repair Or Replace A Metal Roof?
If your metal roof is damaged, it’s vital to determine the extent of the damage right once. Limited damages may usually be rectified, but more significant damages may necessitate a complete roof replacement. There are serious effects to ignoring either situation, so act without delay.
How Much Does It Cost To Repair A Leak In A Metal Roof?
It can be expensive to fix a leak in a metal roof. Patching expenses can range from $625 to $2,980 depending on the size and extent of the damage as well as the supplies required to complete the project. So investigate it and urgently fix your metal roof!
What Is The Biggest Problem With Metal Roofing?
The fundamental drawback of metal roofing is that if the installation or maintenance is done incorrectly and water collects serious effects may result in water damage. Therefore, it’s crucial to take action instantly if you discover a metal roof leak.
How Often Should I Have My Metal Roof Inspected For Leaks?
It is advised that you check your metal roof for leaks at least twice a year so that you can identify any possible problems and address them before they get worse. Additionally, it is advisable to take preventative steps and respond instantly in the event of a roof leak.
Is It Normal For A Metal Roof To Leak In Heavy Rain?
During periods of severe rain, metal roof panels may become loose and start to leak. Therefore, it is essential to repair this issue before the next rainstorm to prevent any harm.
How Long Does A Metal Roof Typically Last Before It Starts To Leak?
Depending on the type of metal used, a metal roof can last anywhere between 40 and 70 years. To maintain its long-term durability, make sure any leaks are quickly fixed.
How do you fix a leaking metal roof?
4 repair options for a leaking metal roof
- Reinstall all fasteners and screws.
- Discard the entire metal roof and replace it.
- To protect the metal roof already in place, apply a roof coating procedure.
- Apply spray foam on top of the current metal roof.
Which material is used to stop water leakage?
Caulking is used to seal leaks and apply waterproofing. When caulking, ready-mixed ingredients like silicone, polyurethane, polysulfide, or polyurethane plus acrylic sealant are used to create a seal.
How do you waterproof a leak?
Concrete leaks can be stopped with polyurethane foams. The foam must be able to fill the crack if it is large enough. When polyurethane foam comes into contact with water, it hardens and fills the crack. These foams provide watertight defence against additional leakage issues.
What sealant is used for a roof?
There are five types of metal roof sealants: acrylic, polyurethane, silicone, rubber, and sealant tape.
by Troy Smart | Jun 8, 2023 | Informative
When it comes to keeping our homes cool and well-ventilated, many of us turn to traditional methods like air conditioning. However, there is a lesser-known yet highly effective alternative called the whirlybird.
In this post, we will delve into the world of whirlybirds, examining their functionality, different types, effectiveness, ideal placement, and the numerous benefits they offer. Additionally, we will also shed light on their drawbacks, allowing you to make an informed decision about whether whirly bird roof vents are the right choice for your home. Let’s get to business and answer “What is a whirlybird?” first.
What is a Whirlybird?
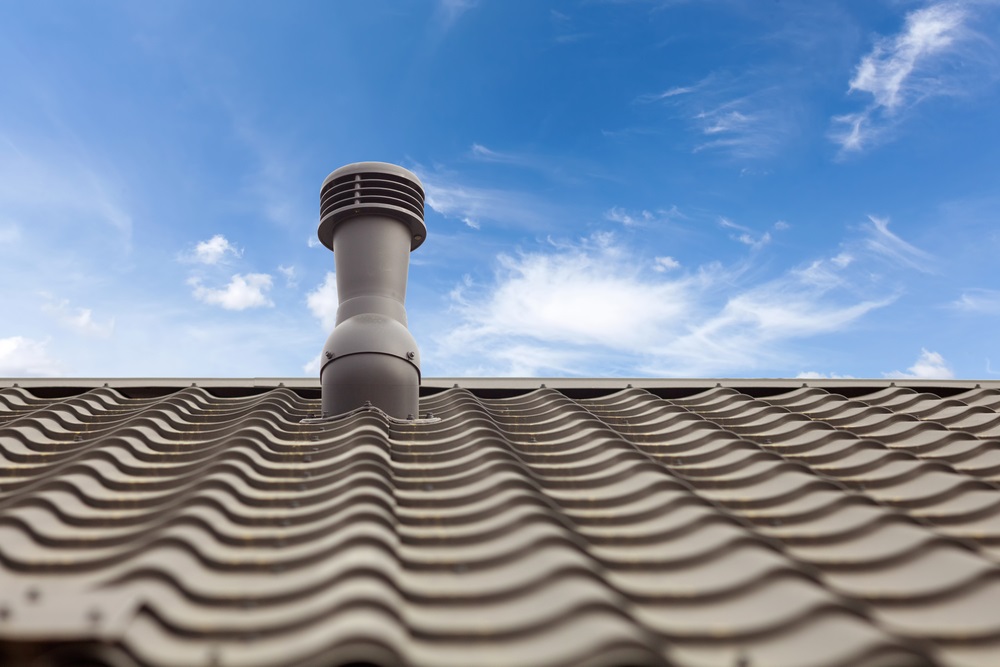
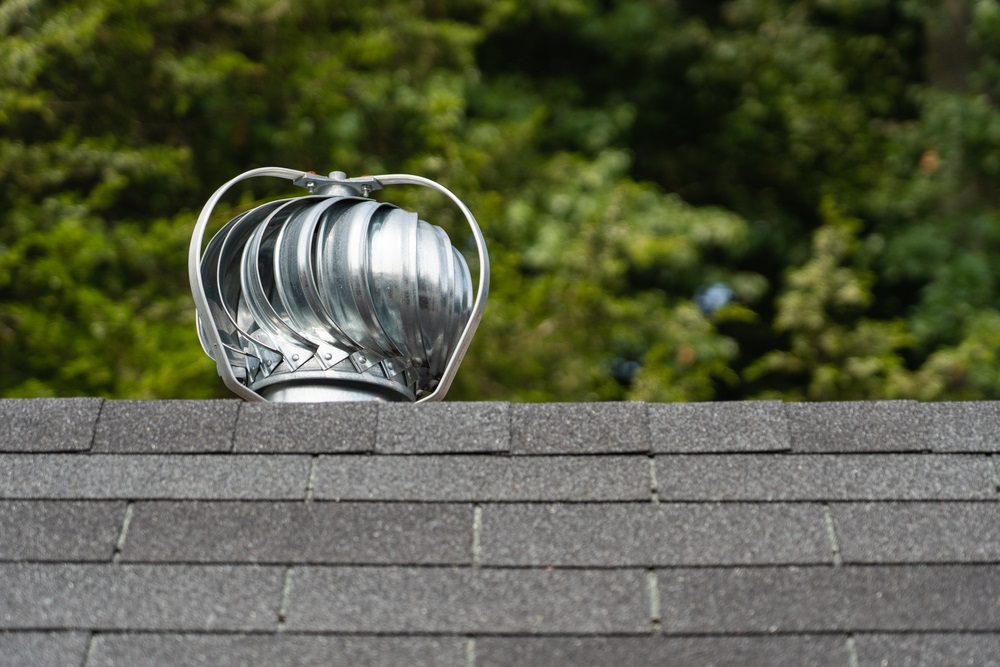
A whirlybird, also known as a turbine ventilator or whirlybird roof vent, is a cylindrical device designed to promote natural ventilation within a building. It harnesses the power of the wind to create airflow and exchange stale air with fresh air, thereby maintaining a comfortable indoor environment.
They consist of a series of vanes or fins that rotate with the slightest breeze or temperature differential. The spinning motion creates a negative pressure inside the structure, effectively drawing out stale air, heat, and moisture while allowing fresh air to enter.
How Do Whirlybirds Work?
Whirlybirds operate on a simple yet ingenious principle. The power of wind and natural convection. As wind flows over the rooftop, it causes the turbine within the whirlybird roof vents to rotate. This rotation creates a pressure difference leading to a vacuum effect, sucking air from inside the building and expelling it through the vent. Simultaneously, fresh air is pulled in through vents, ensuring proper ventilation and cooler living space.
What are the Different Types of Whirlybirds?
Whirly bird roof vents come in various designs to suit different climates, architectural styles, and personal preferences. The most common types include:
- Traditional Wind-Driven Whirlybirds: These classic whirlybirds utilize wind power to drive the rotation of the turbine and facilitate ventilation.
- Solar-Powered Whirlybirds: Equipped with solar panels, these innovative whirlybirds generate electricity to power the turbine, making them ideal for areas with limited wind.
- Hybrid Whirlybirds: Combining wind and solar power, these whirlybirds offer enhanced performance in various weather conditions.
Do Whirlybirds Really Work?
Yes, whirlybirds have proven their effectiveness time and time again. Their wind-driven or solar-powered turbines ensure continuous ventilation, preventing the build-up of heat, humidity, and pollutants inside the building. Proper ventilation can contribute to improved indoor air quality, reduced energy consumption, and a more comfortable living environment.
While the effectiveness of whirlybird roof vents may vary depending on factors such as climate, building design, and installation, they have proven to be a valuable ventilation solution in many cases. Their ability to remove hot air, reduce moisture build-up, and minimize condensation can significantly improve indoor air quality and reduce the load on air conditioning systems. However, it is important to consider the specific conditions and requirements of your property before investing in Whirlybird roof vents.
Where is the Best Place to Put a Whirlybird?
To maximize the benefits of a whirlybird, it is crucial to install it in an optimal location. The ideal spot is typically on the highest point of the roof.
Ideally, they should be installed on the highest point of the roof, where the prevailing winds are most likely to hit. Placing whirly bird on roof near the ridge or on gable ends ensures efficient airflow and optimal ventilation throughout the building.
Additionally, considering factors such as the building’s orientation, prevailing wind direction, and potential obstructions is essential for the optimal performance of whirly bird roof vents.
How Many Whirlybirds Do I Need?
Determining the number of whirly birds for roof required depends on several factors, including the size of the building, the level of ventilation needed, and the local climate.
As a general guideline, one whirlybird roof vent is usually sufficient for every 100 to 200 square meters of attic or roof space. On average, a 1 to 2-bedroom house will need at least 2 roof whirlybird vents. For a 3 to 4-bedroom house, you will need at least 3 roof whirlybird vents, and for a 4-5-bedroom house, you will need at least 4 roof vents.
However, consulting with a professional can provide more accurate recommendations on the number of roof whirlybird based on your specific circumstances.
| House Size |
Minimum Number of Roof Vents |
| 1 to 2 bedrooms |
2 |
| 3 to 4 bedrooms |
3 |
| 4 to 5 bedrooms |
4 |
Whirlybird Benefits
- Cost-effective Cooling: Enjoy reduced reliance on air conditioning, leading to energy cost savings.
- Enhanced Indoor Air Quality: Continuous ventilation helps eliminate allergens, odours, and harmful pollutants.
- Moisture and Condensation Control: Whirlybirds minimize the risk of mould and mildew growth by preventing moisture build-up.
- Extended Roof Lifespan: Improved ventilation with a whirlybird roof vent can help prolong the lifespan of your roof by reducing heat-related damage.
- Noise Reduction: Whirly bird on roof can minimize external noise intrusion, providing a quieter indoor environment.
- All-Weather Performance: Some whirlybird roof vents are designed to work efficiently even in low-wind or no-wind conditions.
- Easy Installation: Whirlybirds can be quickly and easily installed on most roofs without the need for major modifications.
- Maintenance-free Operation: Once installed, the roof whirlybird requires minimal maintenance and has a long lifespan.
- Natural Light Enhancement: Whirlybirds can be combined with skylights or roof windows, allowing natural light to enter while maintaining ventilation.
- Eco-Friendly Solution: Whirlybird roof vent operates without electricity, reducing your carbon footprint.
Whirlybird Disadvantages
- Limited Effectiveness: Traditional wind-driven roof whirlybird may be less effective in areas with low wind speeds.
- Initial Cost: While whirlybird roof vent is cost-effective in the long run, there is an upfront investment for purchasing and installation.
- Potential Roof Leaks: Poor installation of roof whirlybird can result in water leaks during heavy rainfall. If you have a leaking metal roof, it’s crucial to promptly address the issue by engaging in a good metal roof leak repair service.
- Aesthetic Considerations: Some homeowners may find the appearance of whirlybirds less aesthetically pleasing.
- Limited Cooling Capacity: Whirlybird roof vents provide ventilation but may not be as effective as air conditioning for cooling specific areas.
- Temperature Control: Whirlybirds regulate attic temperatures, but controlling indoor temperatures may require additional measures.
- Prone to Noisy Operation: In rare cases, the rotation of the turbine in wind-driven whirlybirds can produce a low humming sound.
- Risk of Bird Nests: Without proper protection, roof whirlybird can potentially become nesting points for birds.
- Not Suitable for All Roofs: Certain roof types or designs may not be compatible with whirlybird installation.
Harness the Power of Whirlybirds || Let Your Roofs Breathe Fresh
Whirlybirds offer an affordable and eco-friendly solution for enhancing ventilation and maintaining a comfortable indoor environment. Their ability to reduce energy consumption, improve air quality, and extend roof lifespan make them a popular choice for many homeowners.
However, it’s important to consider the potential drawbacks of a whirlybird roof vent such as dependence on wind, initial costs, and maintenance requirements. By weighing the benefits against the disadvantages, you can make an informed decision and enjoy the cooling benefits of a whirlybird while ensuring it suits your specific needs and circumstances.
Ready to transform your roofing experience?
Look no further than Smart Roof Whirlybird Experts, your go-to solution for roof replacement Perth.
Our team of skilled professionals is dedicated to delivering top-notch expertise to transform your roof. With our premium materials, we ensure a durable and stylish solution that stands the test of time. Why settle for ordinary when you can have extraordinary colorbond roof replacement.
Contact Smart Roof Experts today for exceptional roofing services in Perth!
FAQs
Do whirlybirds keep the house cool?
Whirlybirds remove heated air that has accumulated between the roof and the ceiling. This keeps your home cooler by preventing the same heat from flowing into the rooms through the ceiling area.
How long does a whirlybird last?
The lifespan of typical residential whirlybirds is 10 to 15 years on average.
Can rain get to Whirlybird?
Whirlybirds are made to resist strong winds and rainfall. There is no water penetration because of the design of the overlapping fins.
Are whirlybirds noisy?
A working whirlybird is almost silent; it only makes noise when it is malfunctioning. Cheap or improperly fitted whirly bird on roof are frequently susceptible to this. Make sure you speak with a roofing specialist before purchasing to prevent this.
Do whirlybirds need electricity?
When properly maintained, whirly birds for roof may spin for more than 20 years without any electricity, keeping your residence cosy and pleasant.
Do whirlybirds work in winter?
All year long, Whirlybird ventilators are effective. They keep your house cool in the summer and dry out the moisture in the winter.
Do whirlybirds reduce humidity?
Whirlybirds function to eliminate excess moisture and humidity during cold weather to stop the growth of germs and mould. Your home may be more energy-efficient, ventilated, and odour- and stale-air-free for a reasonable price by installing a whirlybird.
What is the flow rate of a whirlybird?
Whirly birds for roof have a capacity that can range from 100 to 200 cubic metres per hour to around 2,500 cubic metres per hour on a commercial basis.
Are whirlybirds sustainable?
Whirly birds for roof are an environmentally sustainable and user-safe alternative to other systems since they operate continuously (24/7) without releasing any harmful gases or toxins.
Are all whirlybirds the same size?
No, whirlybirds are not all the same size. The size of a whirlybird can vary depending on the specific model and manufacturer.
The most common sizes for whirlybirds are typically between 12 inches (30 cm) and 24 inches (60 cm) in diameter. However, there are smaller and larger sizes available in the market as well.
Is one whirlybird enough?
The vast volume of air in the ceiling cavity cannot be recycled by a single whirlybird quickly enough to keep it from heating up. If you install enough of them, they will function.
Some experts believe it would require at least 10-15 whirlybirds to efficiently cool the typical Australian home.
Can water leak through Whirlybird?
Do whirlybirds leak then? They don’t. No matter how windy the day is or how light or heavy the rain is, the design of the turbine prevents water from entering the turbine through the fins.
Are whirlybirds good?
Whirlybirds and the ventilation they give are helpful throughout the winter as well since they assist in removing wet air, which lowers winter energy costs. They do this by preventing dampness from being produced by condensation of moisture-rich air that is present both inside and outside the house.
by Troy Smart | May 23, 2023 | Informative
The idea of skylights, which spread the tempting splendour of natural light into our living spaces, has been universally adopted by the realms of architecture and design for a long time.
Skylights are windows in the roof or ceiling that let sunlight enter, creating an exclusive and uplifting ambience.
The different facets of skylights, like “how do skylights work?”, their use, varieties, methods of construction, and advantages and disadvantages of skylights, will be covered in detail in this post.
What is a Skylight?
Since olden times, skylights have been used as architectural elements to bring the beauty of natural light into our living spaces. A skylight on roof is simply holes in a ceiling that let sunlight through, bringing a distinctive and energising atmosphere.
Skylight living room is intended to improve the interior atmosphere and offer many advantages, such as more natural light and energy efficiency.
We shall explore all facets of skylights in this article, including their function, varieties, methods of construction, and advantages and disadvantages of skylights.
The Purpose of Skylights: Natural Light for a Brighter Interior
Skylight on roof is essential in architecture and interior design because they distribute and catch natural light, which lessens the need for artificial lighting and makes a place appear brighter and livelier.
Natural light benefits our well-being because it fosters a sense of tranquilly, uplifts the mood, and increases productivity. Skylights are especially useful in locations like corridors, restrooms, or interior areas that don’t have windows or have limited access to natural light.
Types of Skylights
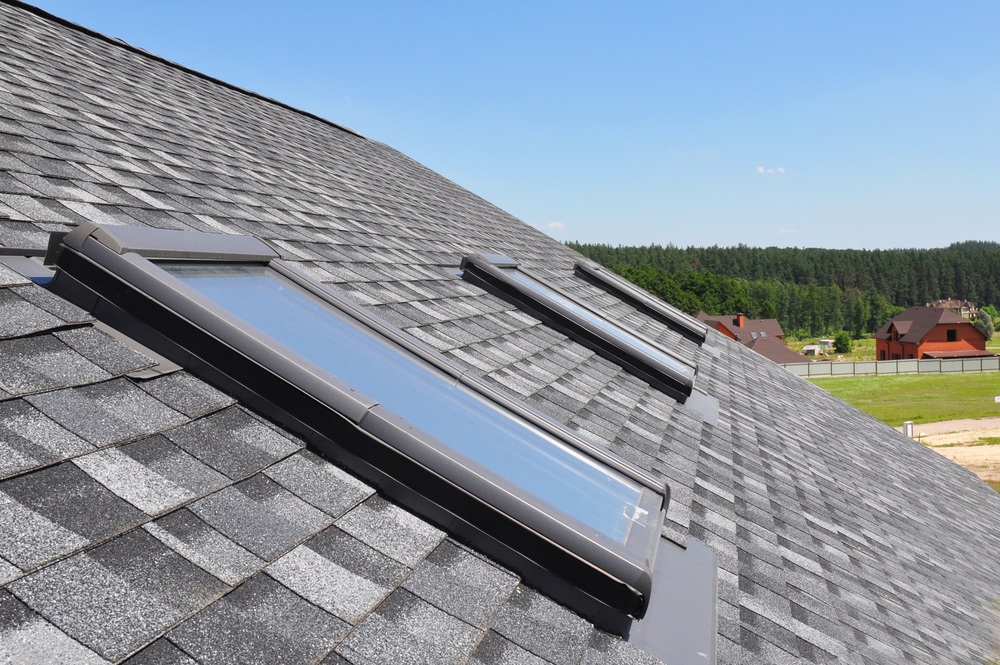
1. Fixed Skylights: A Window to the Sky
The most typical kind of ceiling skylights is fixed ones, which are intended to stay still and always give a view of the sky. They may be put on flat or sloped roofs. Skylights Canberra are available in a variety of sizes and forms, including rectangular, square, and circular.
Large volumes of natural light may be brought into space easily, and fixed skylights can also serve as a magnificent focal point.
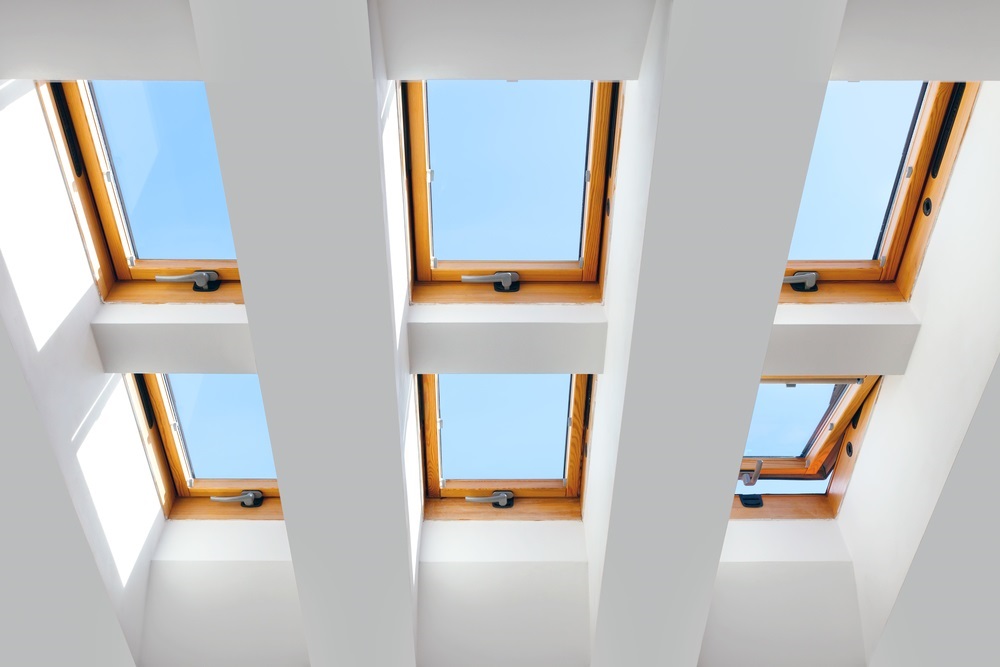
2. Ventilated Skylights: A Breath of Fresh Air
The ability for the room to be ventilated is another advantage of ventilated skylights. When ventilation is required, they can be manually or electrically operated, assisting in temperature and airflow control.
In places where moisture and smells tend to build up, such as kitchens and bathrooms, ventilated Skylight on roof is especially helpful.
3. Tubular Skylights: Light up Small Spaces
Sun tunnels, another name for tubular skylights, are portable and adaptable choices for lighting tiny rooms. They are made out of a reflective tube that collects light from the roof and sends it through a diffuser into the inside.
For spaces with little roof space or places that need concentrated lightings, such as closets, hallways, or alcoves, tubular skylights are a good option.
Pros of Tubular Skylights: Bringing Sunshine Indoors
i. Energy Efficient: Saving on Lighting Costs
Because they capture natural sunshine and lessen the need for artificial lighting during the day, tubular skylights are very energy-efficient. They aid in lowering energy use and utility costs by efficiently lighting tiny spaces.
ii. Versatile: Perfect for Bold Spaces
In locations where regular skylights cannot be constructed owing to a lack of roof space, structural limitations, or design difficulties, tubular skylights are especially helpful. Because of their small size and positioning versatility, they are the perfect choice for lighting up small spaces like closets, corridors, or rooms with obscured views.
iii. Daylight Harvesting: Promoting Well-being
Our health and well-being are positively impacted by natural light. Tubular skylights increase the general comfort and liveability of the region by bringing sunshine into areas that would otherwise stay dark. Tubular skylights help to a healthier and more comfortable atmosphere by fostering a connection to the outside and promoting the circadian rhythm.
Limitations of Tubular Skylights
i. Limited Illumination Range
Tubular skylights offer a smaller range of light dispersion than bigger skylights because of their compact form. While they are great for tiny spaces, they might not be enough to appropriately light bigger rooms.
ii. Dependency on Sunlight Availability
For best results, tubular skylights require direct sunlight. The quantity of natural light entering the area will be lessened if the sun is not shining or is blocked by clouds or shadows. As a result, the location and environment can affect how successful they are.
iii. Potential Heat Gain
In warmer areas, direct sunshine can contribute to heat gain as well. Tubular skylights may raise the temperature in the space, possibly requiring extra cooling techniques to keep occupants comfortable.
Elements of Ceiling Skylights: The Mechanics of Sunlight Entry
A. Frame & Curb: The Foundation of Skylight Stability
The skylight’s stability is guaranteed by the frame and curb, which offer structural support. They are often constructed to endure the elements from materials like wood, metal, or vinyl.
B. Glazing: The Windowpane to Natural Light
The translucent material used to cover the ceiling skylights’ opening is referred to as glazing. Both glass and plastic may be used to make it, and each has its benefits. While plastics like acrylic or polycarbonate offer higher impact resistance and insulating qualities, glass gives greater clarity and durability.
C. Flashing: Guaranteeing Water-Tautness
A crucial element in preventing water intrusion near the ceiling skylights is flashing. It is often fitted around the skylight’s borders to form a watertight barrier, and it is constructed of metal.
D. Diffuser: Scattering Light in a Sophisticated way
Tubular skylights contain the diffuser as a part. It is a decorative component that diffuses and spreads the natural light that comes in via the tube to illuminate the space evenly and softly.
E. Shades and Blinds: Regulating Light Intensity
Some ceiling skylights come with the option of installing curtains or shades to regulate how much light enters the room. The use of these add-ons enables customization of natural light intensity, privacy, and glare reduction.
Design & Construction of Skylights: Pathway for Sunbeams
Skylights are built with durability, usefulness, and aesthetic appeal in mind. Modern skylights roof use cutting-edge materials and technical methods to endure weather, stop leaks, and offer the best insulation.
It is crucial to get expert advice when thinking about installing skylights roof so they can evaluate the structural needs and make sure the right Bunnings skylight installation procedures are used.
How to Choose the Best Skylight
a. Consider the Purpose & Location
Consider the space’s unique requirements before skylight installation. Decide if the objective is to improve ventilation, maximise natural light, or both. To choose the best sort of skylight, take into account aspects such as room size, orientation, and lighting conditions.
b. Assess Energy Efficiency
Choose skylights with excellent ratings for energy efficiency. Look for glazing alternatives with low emissivity coatings, such as double or triple-pane glass, that offer the best insulation. Additionally, think about skylights roof with built-in shade mechanisms to control light and heat as necessary.
c. Skylight Installation & Maintenance Requirements
Skylight installation takes skill to ensure good sealing and stop leaks. Analyse the installation procedure’s difficulty to decide if you need expert help along with skylight installation cost. Consider the long-term maintenance requirements as well of skylights roof, such as repairing worn-out parts or cleaning the glass and take those into account when making your choice.
d. Seek Professional Advice
Consult with architects, designers, or experts in skylights who may offer professional guidance catered to your unique needs. They may aid in making the right skylight type selections, figuring out the finest locations, and skylight installation cost, and taking into account any structural issues, including skylights Perth prices.
Pros of Skylights: The Benefits of an Open Ceiling
1. The abundance of Natural Light
Skylights flood interior areas with natural light, giving them a light and airy feel. Even the deepest crevices may become hospitable, well-lit regions thanks to skylight orange.
2. Enhanced Aesthetics and Visual Appeal
Any room benefits from the distinctive architectural element of skylights Wollongong, which adds visual interest and improves the overall aesthetics. They can be created in a modern, classic, or minimalistic design to go well with the structure such as Velux skylights.
3. Connection with the Outdoors
Skylights provide a direct link to the sky and the outside world. They offer glimmers of the moon, night-time stars, and shifting weather patterns. This connection to the natural world can promote serenity and make living more immersed.
4. Potential Health and Well-being Benefits
Numerous health advantages of exposure to natural light include elevated vitamin D synthesis, enhanced mood, and better sleep. You may improve your general well-being and create a healthier atmosphere by adding skylights to your living areas.
Cons of Skylights
1. Risk of Heat Gain and Loss
Large skylights or those with poor glass, in particular, can cause heat gain during the summer and heat loss during the winter. This could lead to higher energy costs for heating or cooling, accordingly.
2. Potential for Glare and UV Exposure
Skylights that let direct sunlight in can glare, which is irritating for occupants. Additionally, over time, UV radiation can cause the fading of furniture, carpets, and artwork. Consider UV-protective glazing alternatives and glare-controlling curtains or blinds to help alleviate these problems.
3. Skylight Installation Cost & Challenges
Skylight installation can be challenging since it calls for precise flashing, sealing, and connection with the pre-existing roof structure. Poor skylight installation might result in leakage and other problems.
Additionally, skylights may need continuous care and cleaning and can be expensive, especially if they are bigger or have customised patterns.
Illuminate Your Space with Skylights
Skylights provide an alluring method of bringing natural light into our living areas, changing them into lively and welcoming surroundings. Traditional fixed skylights, vented solutions, or small tube skylights all provide many advantages, including greater energy efficiency, improved aesthetics, a link to nature, and potential health benefits.
But it’s crucial to thoroughly weigh the advantages and disadvantages of each type of skylight WA, as well as elements like skylights installation needs, location, and maintenance concerns.
You can make an informed decision and confidently jump at the beauty of the sky into your house by doing this and getting professional advice about skylights Toowoomba. So, embrace the charm of skylights for houses and let them cast a fascinating radiance of natural light across your rooms.
FAQs About Skylights
How can skylights sometimes become problematic?
Depending on how they are positioned and how big they are, skylights for houses can make a space too bright and glaring. Skylights can also reduce energy efficiency owing to heat radiation, convection, inadequate insulation, condensation, and leaks, just like any other window.
Are there any benefits to having a skylight?
Absolutely! Skylights are beautiful windows that provide an exclusive view of the sky, enhancing the visual appeal and changing the appearance of any space. Especially during warmer months or in warm areas, venting skylights can help with natural ventilation-based cooling by bringing in fresh breezes.
Will installing skylights weaken the roof?
Skylights do not affect a roof’s structural stability when they are built properly. However, if not installed or maintained correctly, they may increase the possibility of leakage and associated problems.
How much weight can a skylight hold?
Skylights are required by the Occupational Safety and Health Administration (OSHA) to sustain 200 pounds of minimum pressure. To comply with this requirement, the majority of skylights need extra safety elements such as a railing or skylight safety screen.
Is it worth getting a skylight that opens?
Absolutely! The privacy and comfort of your house or place of business can be improved by installing skylights. To maximise its advantages, it is necessary to think about opening or ventilating skylights while upgrading.
What is a good alternative to skylights?
Suitable options include sun tubes, sometimes referred to as light tubes, solar tubes, or tubular daylighting devices (TDDs). Although they might not be as bright as skylights or windows, these gadgets, which resemble recessed ceiling lights, offer a substantial improvement over traditional electric lights.